Creative Studio Portrait Lighting: How Three Simple Setups Tell a Completely Different Story

Your branding photos do not have to look like everyone else's. That is the whole premise behind this shoot with Amanda Johansen, and it is the same philosophy I have been exploring across a series of posts here on the blog. If you are just getting started with creative studio work, One Model, Five Lighting Setups: Maximum Impact, Minimal Gear is the foundation. If you are ready to go deeper into dramatic, directional light One to Three Light Studio Lighting for Artist Portraits is where that goes. This post sits in the middle: a real client session, three completely different setups, and a breakdown of every creative decision so you can take these ideas straight into your own studio.
Amanda is building a personal brand around wisdom, feminine power, and intentional living for high-achieving women.
That is not a gray-background-and-blazer brief. So we did not shoot her that way. Here is exactly how we built these looks, gear list and all, so you can take these ideas into your own studio.
Studio gear used for Amanda Johansen branding photography session: Godox SL150R, Profoto D2, Profoto B10x, Photek SoftLighter II umbrella, stretch fabric backdrop, C-stands, V-flat
Studio Breakdown
What We Used to Build This Look
Two Profoto strobes, one constant RGB light, a fan, and $125 worth of stretch fabric. Here is every piece of gear we used to create these looks.
Total Fabric Cost
$125
Ivory stretch polyester across both the backdrop panel and all draped sections. Soft satin quality on camera, holds drape beautifully, and moves with airflow.
Shop the fabric ↗Key Mood
Godox SL150R
Constant RGB light used to create the warm amber mood. Full color control, and it runs cool enough to leave on for the entire shoot.
Ambient Fill
Profoto D2
Bounced into the white ceiling for soft, even ambient fill across the whole space. Profoto now makes the D3, which is what this link goes to.
Dark Setups
Profoto B10x
Controlled the subject in the dark background setups. Compact, powerful, and worth every penny.
Modifier
Photek SoftLighter II 46"
A shoot-through umbrella with a diffusion panel that wraps light beautifully around a subject. One of the most flattering modifiers available at any price point.
Backdrop
Ivory stretch fabric panels
Hung from a long backdrop stand. Also available at Westlight Studios if you want to see it in person before buying.
Rigging
C-stands with arms and clamps
Individual fabric panels attached for dimensional draping. The thing that takes a backdrop from flat to sculptural.
Movement
Fan
Positioned off to the side during exposure. The difference between fabric that sits there and fabric that lives.
Dark Setups
Black V-flat
Positioned behind the subject, unlit. Background falls to black naturally. No compositing, no tricks, no extra time in post.
Setting Up the Fabric Background
This is the setup photographers ask about most when they see these images: how did you do the fabric?
The main backdrop panel hung from a long backdrop stand, with additional individual pieces draped on C-stands using arms and clamps to build out the environment on both sides. The goal was to create a room within a room, not just a flat wall behind the subject. When you clamp fabric to a C-stand arm and let it hang with a little slack, it reads as architecture. Amanda was not standing in front of a backdrop. She was inside something.
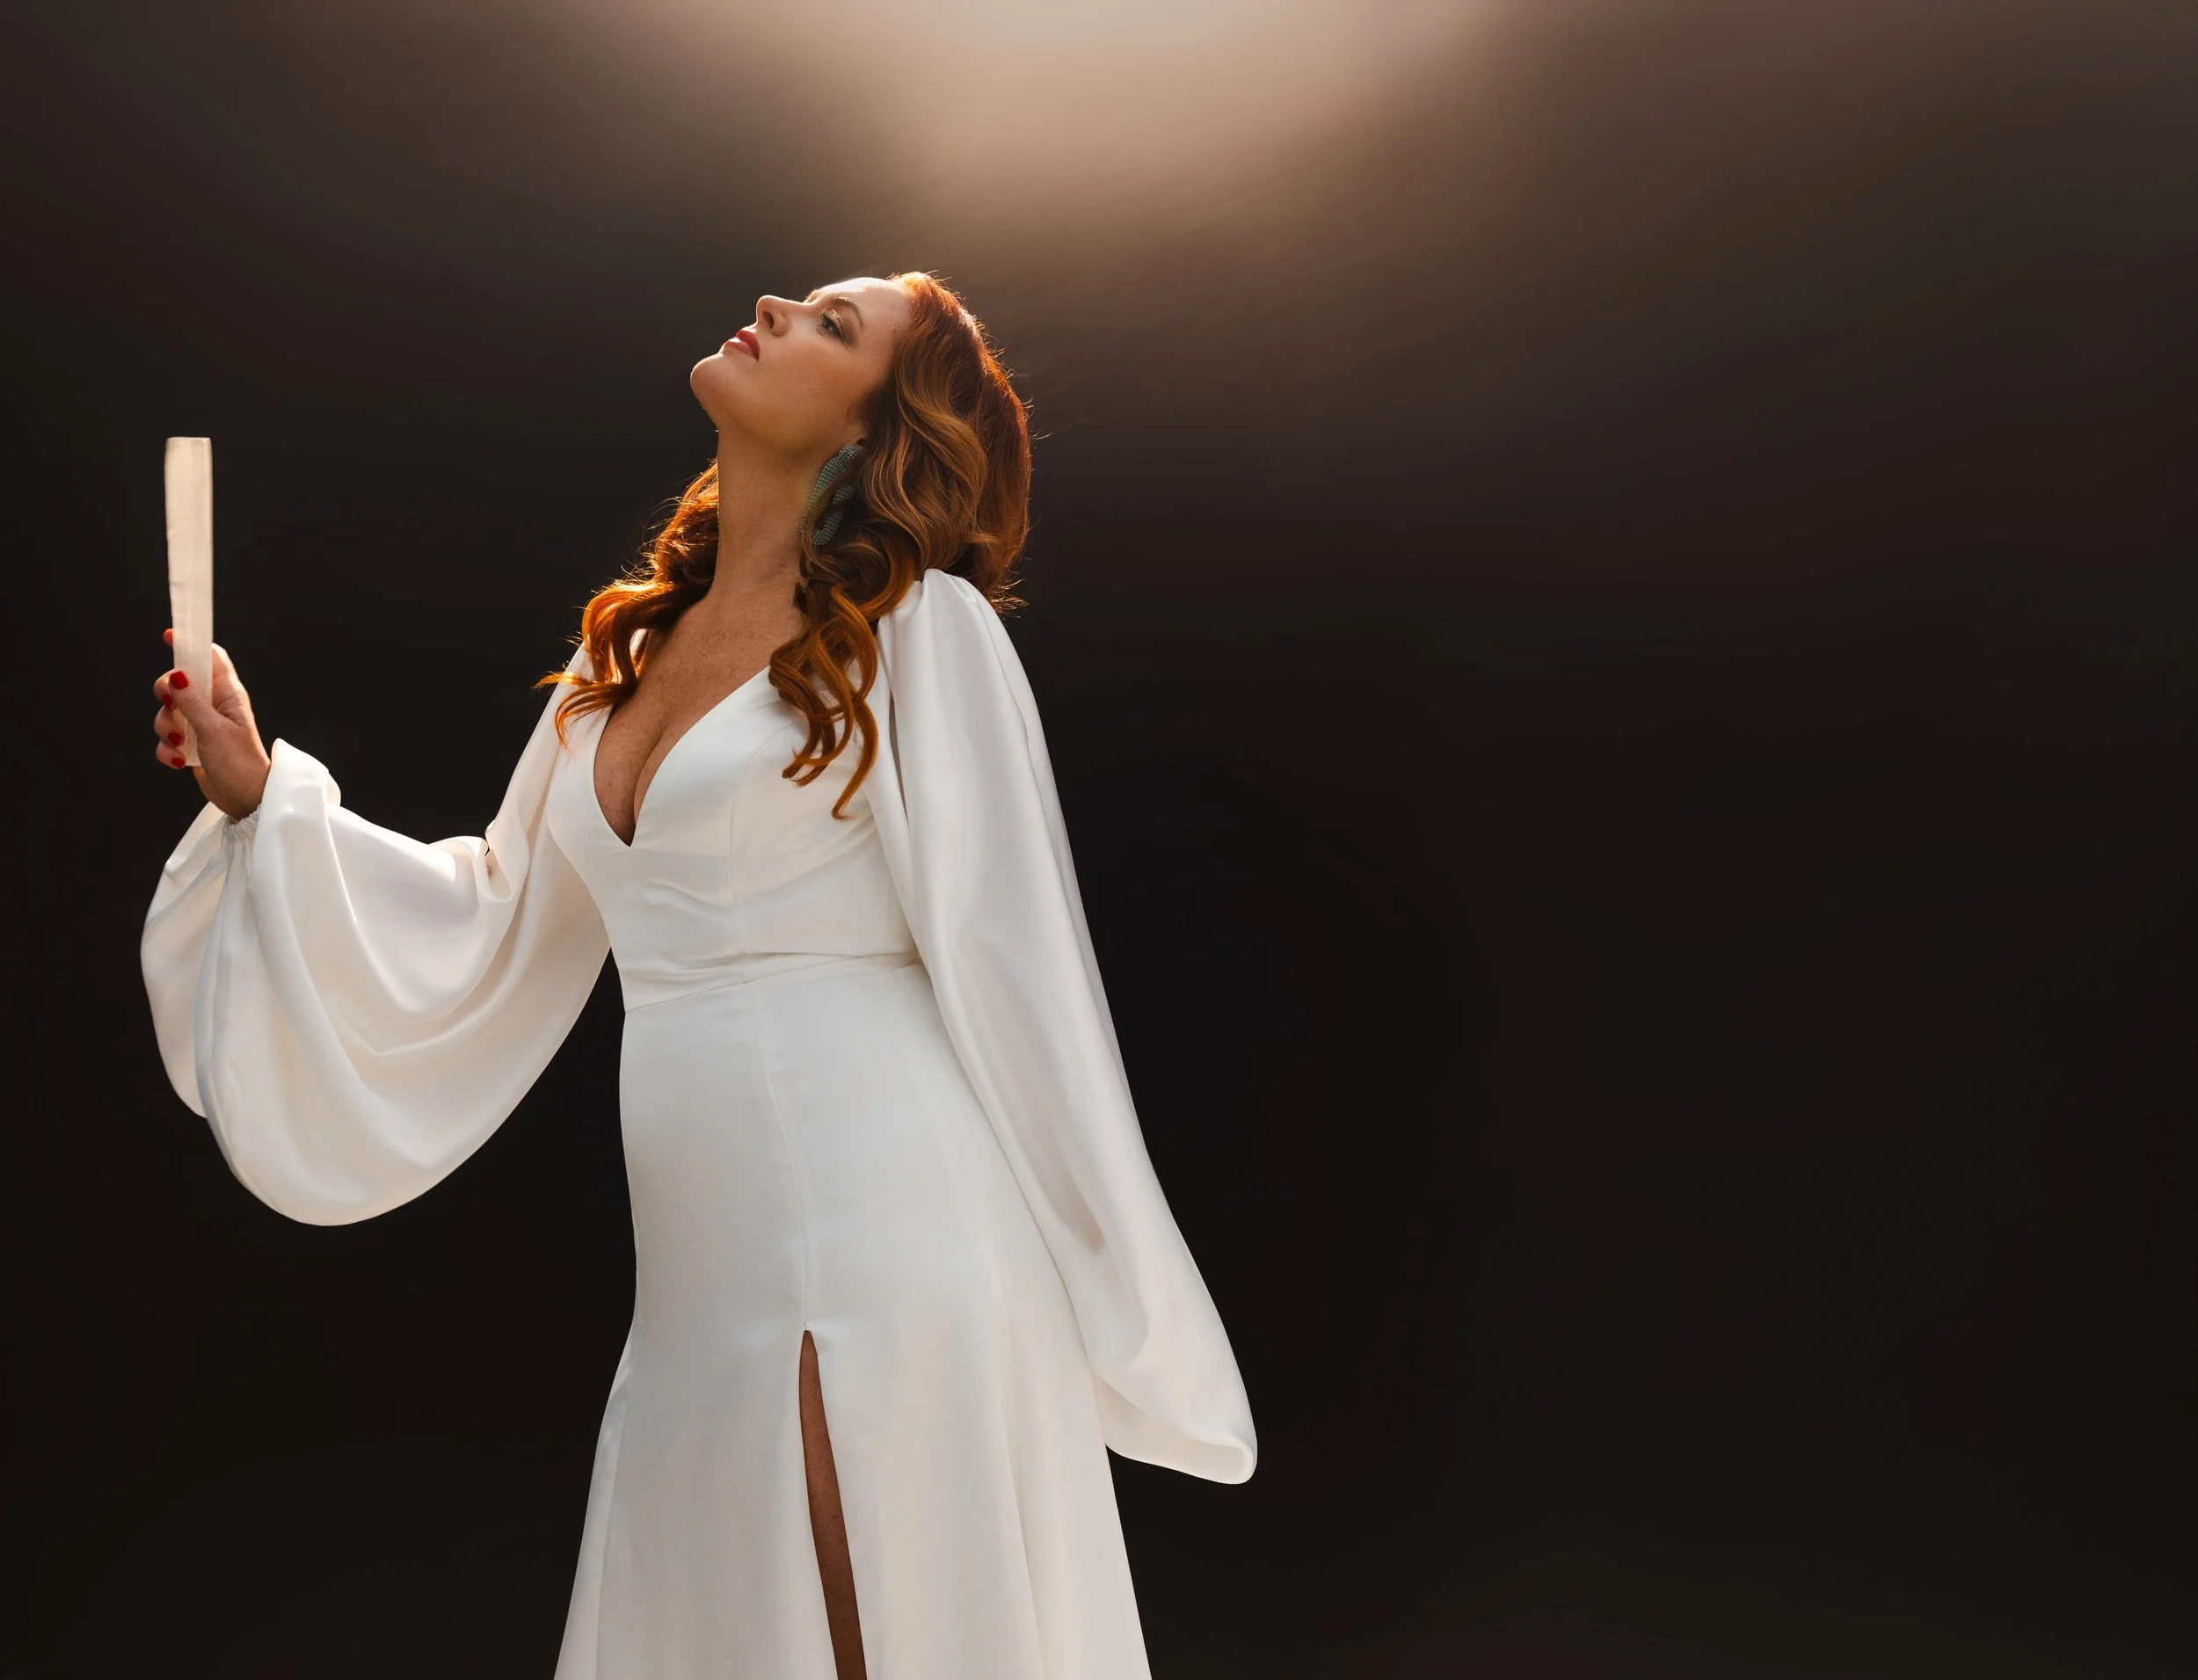
The fan running low off to the side is what separates fabric from wallpaper. Without it, the panels sit flat and static. With it, the fabric breathes. It catches air at the edges and moves in slow, deliberate waves that read as intentional and ethereal on camera, especially with a slightly longer shutter speed.
What I love about this section of the shoot is that Amanda becomes part of the environment rather than standing in front of it. In image one she opens her arms and the fabric frames her like wings. In image three she peers through a gap between panels. In image eight she sits on a prop cube with fabric draped around and below her, and the whole frame becomes sculptural.
What made this work:
The C-stand rigging gave us three-dimensional depth instead of a flat backdrop. The fan made the fabric feel alive. The light was kept soft by bouncing it off of the ceiling and also using a Umbrella closer to Amanda for some shots for a little more drama.
Setup 2: Constant Light Warmth with Ceiling Bounce Fill

Gear for this setup:
Long backdrop stand (Westlight Studios) for main panel
C-stands with arms and clamps for individual draped sections
Ivory stretch fabric panels ($125 total, available on Amazon)
Fan positioned low off to the side for fabric movement
Profoto D2 as soft key light
Profoto B10x for fill or separation as needed
The first section of this shoot was built around the Godox SL150R constant light. If you have never worked with a constant RGB light in a portrait session, this is your sign to try it. The warm amber quality it produces is completely different from a strobe, and because it is always on, you can see exactly what you are getting before you fire a single frame.
I positioned the Godox to create the rich, directional warmth you see wrapping around Amanda in the darker, more cinematic images. To keep the shadows from going too deep and losing detail in her dress and skin, I bounced a Profoto D2 upward into the white ceiling above us. This is one of my favorite tricks for ambient fill: it adds light without adding a visible source, so the image still reads as one cohesive mood even though two lights are technically in play.
The ceiling bounce opens the shadows without competing with the constant light. You still feel the warmth and the directionality. You just get more of the subject.
What made this work:
The constant light set the emotional temperature of the room. The ceiling bounce kept the shadows from swallowing Amanda's details. Two lights, one clear intention.

Setup 3: Dark Background, Single Direction, Pure Power
This is the contrast section, and it is my favorite for showing what a subject is actually made of.
We placed Amanda against a black V-flat, unlit. Nothing here except Amanda, the light, and negative space. That combination creates a kind of presence that a clean or busy background simply cannot match. When the background absorbs light rather than reflecting it, every photon you send toward the subject does exactly one job.
In the warm profile portraits, the Godox SL150R from above and slightly behind creates a rim and halo effect that wraps Amanda's shoulders and the edge of her face in amber light while her features stay in controlled shadow. In the straight-on images, I brought the light closer and more frontal to open up the face. In the black and white version, the voluminous sleeves of her dress become almost abstract against the dark background, which is an unexpected compositional bonus you only discover when you strip color away.

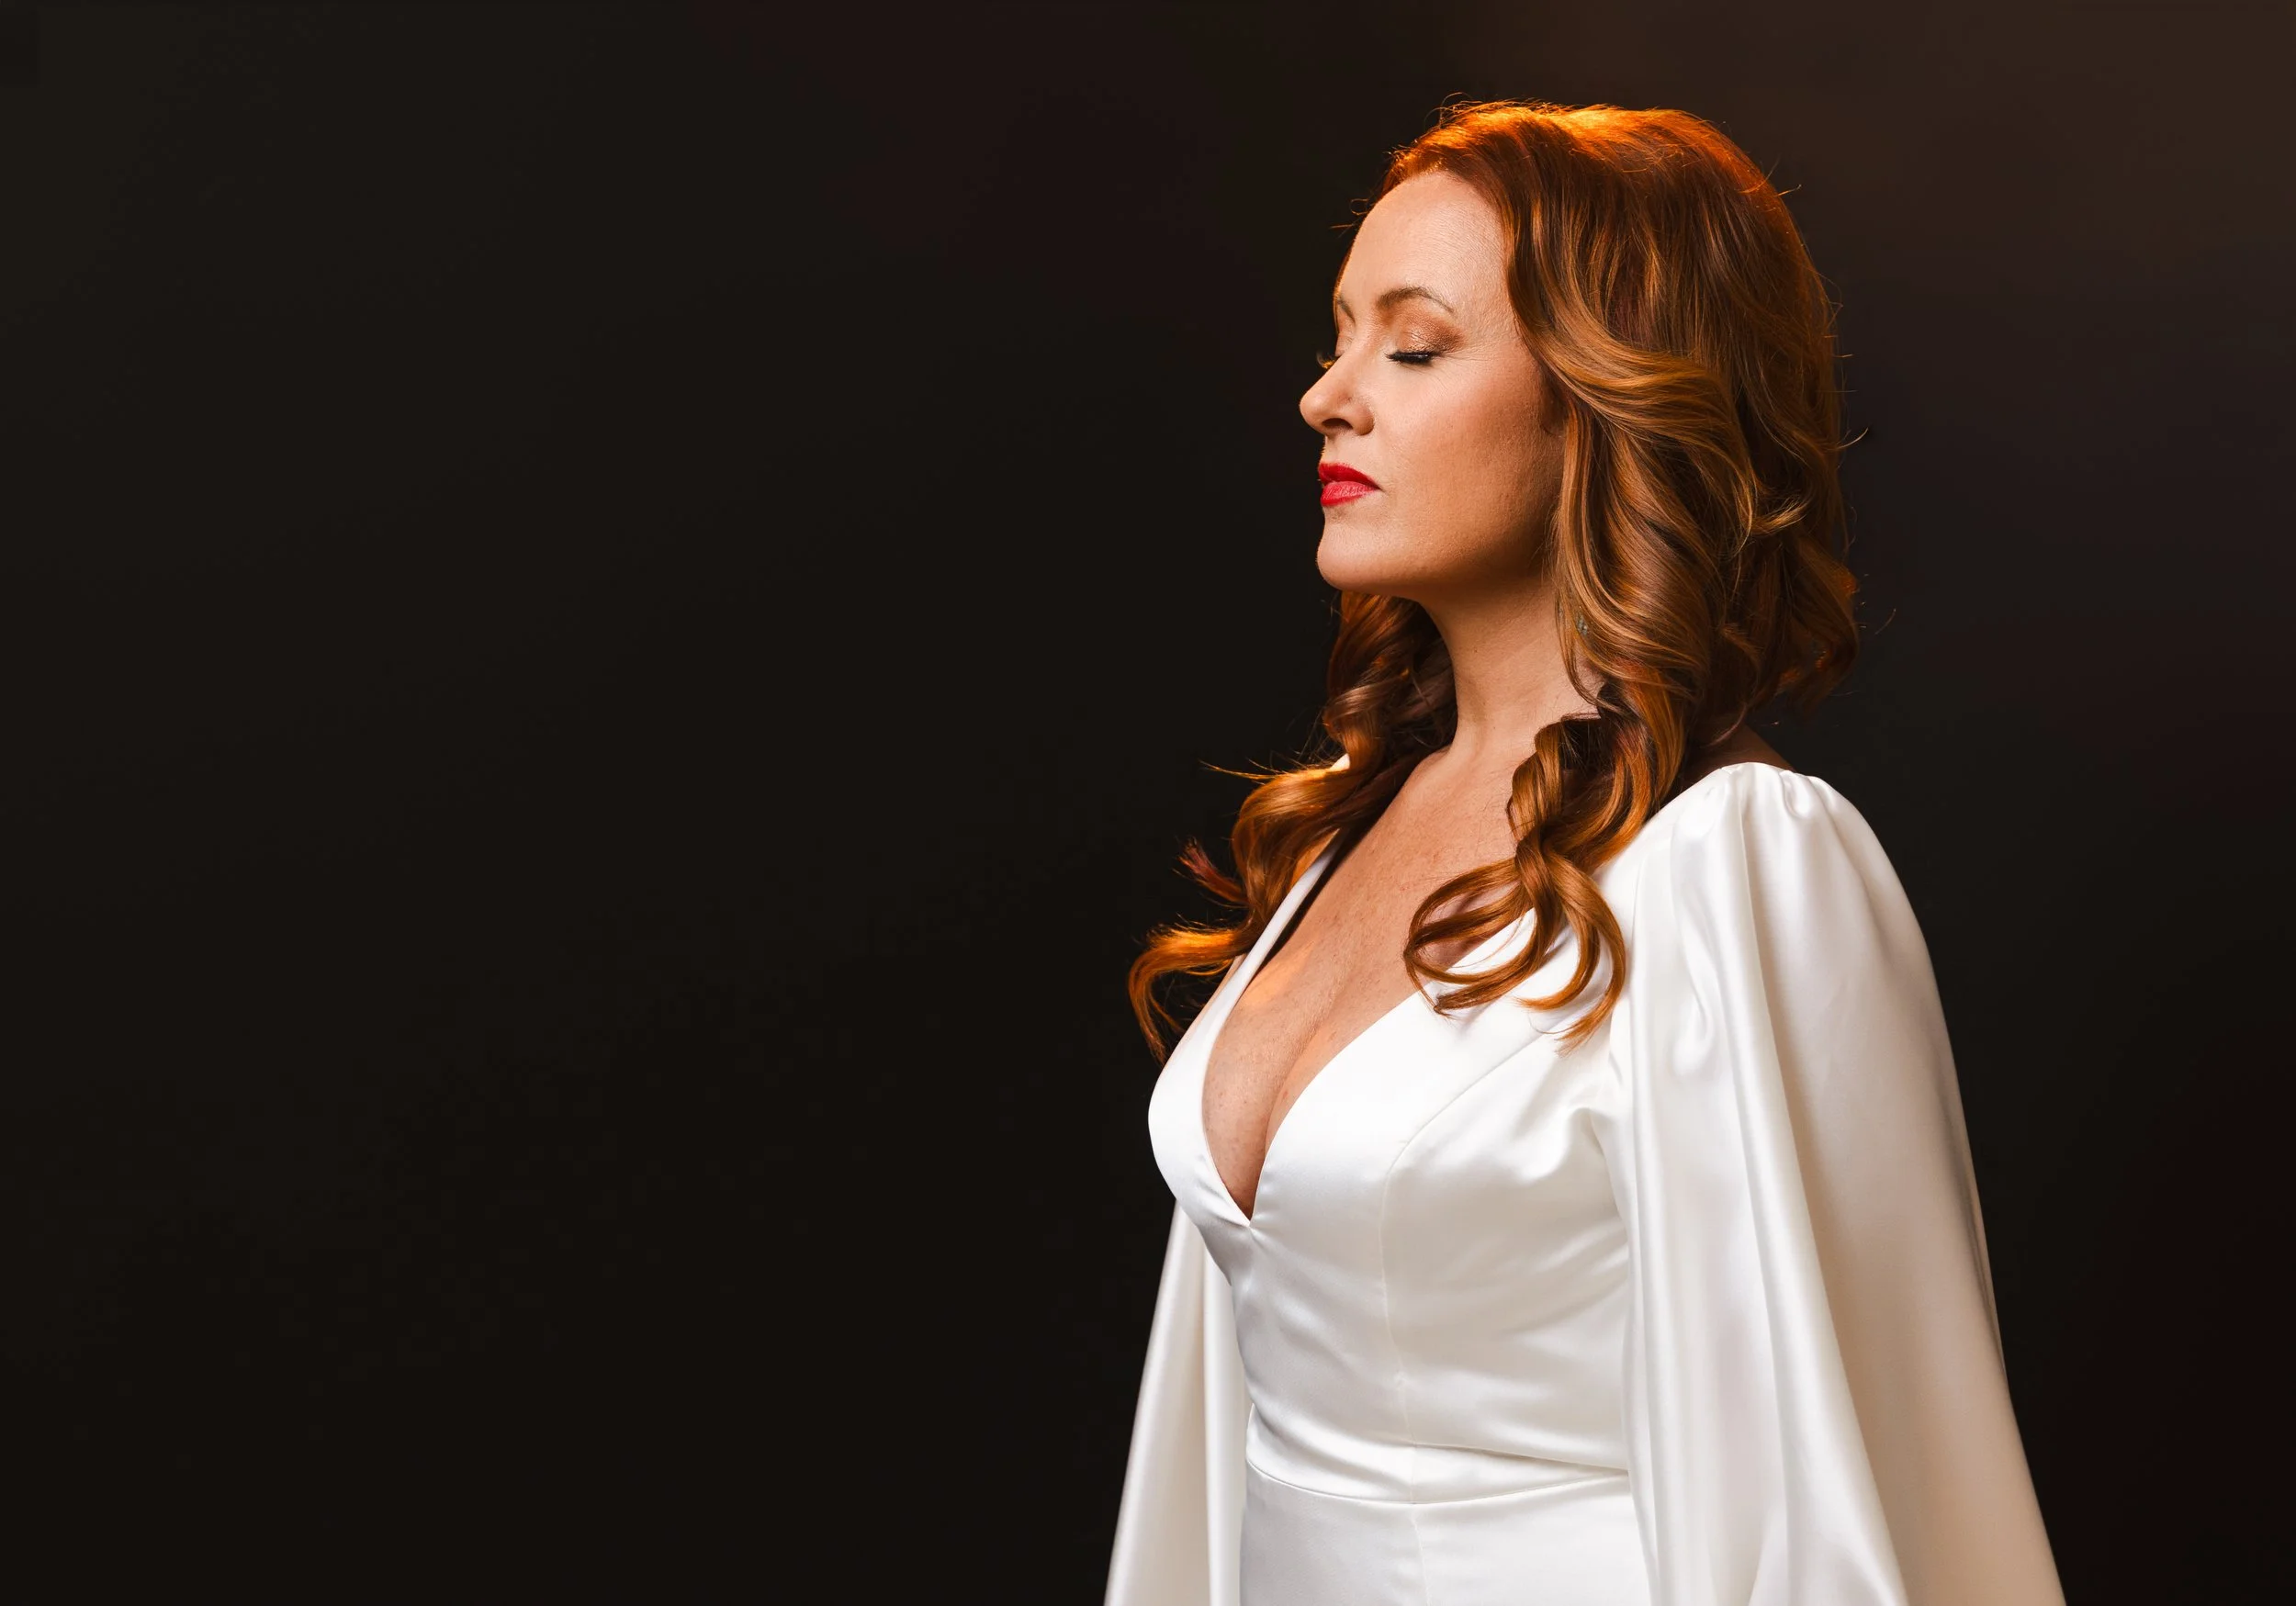
These are the images that stop a scroll. They communicate power and calm at the same time, which is exactly what Amanda's brand needed.
What made this work:
Dark background means the light has nowhere to scatter. A constant light lets you see the rim and halo effects in real time and adjust position before you fire a single frame. No guessing, no test shots wasted. You see it, you refine it, you shoot.
Gear for this setup:
Godox SL150R positioned slightly above and behind for rim and halo separation
Profoto D2 for any frontal fill as needed
Black V-flat placed behind the subject, unlit
Setup 4: Direct Light, White Background
Why This Works for Branding Photography, Not Just Editorial


Here is the business point inside the creative one: not every client needs fabric and flowing gowns. But every client deserves images that actually match who they are.
Amanda is building a community and a personal brand around reclaiming your time, your energy, and your sense of self as a woman. A standard headshot against a gray background would have been technically fine and completely wrong for her. The fabric environment, the dramatic lighting, the motion and scale of the setup: all of it communicates something specific about who she is and what she is building.
The final clean portrait, shot against a simple white background, shows how we bookended the session. She has that image too. It works beautifully. But it works even better as part of a gallery that also includes the editorial and dramatic work from earlier in the day. The range is what makes a strong branding session. You are not choosing between polished and creative. You get both.
That range is also what makes these images versatile. Amanda can use the ethereal fabric images for one audience, the dramatic dark portraits for another, and the clean white background shots wherever a simpler look is needed. One session, three distinct visual languages.
Budget lighting alternatives for studio portrait photography: Godox AD600, Godox AD200, Neewer CB100C constant light, Fotodiox 40-inch umbrella softbox
Build It on a Budget
You Do Not Need Profoto to Pull This Off
I own all three of these. They are not consolation prizes. If you are building your kit or working with a tighter budget, these are the lights I would actually tell a friend to buy.
Ambient Fill — swap for Profoto D2
Godox AD600
Powerful enough to bounce into a ceiling and fill a full studio space. This is the one I reach for when I want Profoto-level output without the Profoto price tag.
Dark Setups — swap for Profoto B10x
Godox AD200
Compact, portable, and genuinely impressive for the price. Perfect for targeted, controlled light in darker setups where you need precision without bulk.
Key Mood — swap for Godox SL150R
Neewer CB100C
Half the price, half the power, still worth it. You will not get the same output as the SL150R, but for creating mood and color in a controlled studio setup, it absolutely gets the job done.
Modifier — swap for Photek SoftLighter II
Fotodiox 40" Umbrella Softbox
$20. That is not a typo. Wraps light beautifully, sets up in minutes, and works with almost any strobe or speedlight you already own. There is no reason not to have one of these in your kit.

Final Thoughts
This shoot is proof that creative studio portrait photography does not require a massive gear investment. It requires a clear point of view. The fabric cost $125. The V-flat was already in the studio. The ceiling bounce is always free. What made these images work was knowing who Amanda is and building every setup around that.
If the One Model, Five Lighting Setups post was the foundation, this is the next room you walk into. Same philosophy: do more with less, and make every element mean something.
Photography workshops and 1:1 mentoring with Tausha Dickinson in Nashville TN: intimate group workshops, private mentoring, and virtual coaching for photographers
Work With Me
Ready to Build This Kind of Creative Confidence?
I teach what I actually do. Whether you want to refine your lighting, push your creative vision, or figure out why your studio work is not clicking yet, I have a way in for you.
Nashville, TN
Tausha
Dickinson
Workshops and mentoring for photographers who are done guessing and ready to shoot with intention.
See all offerings ↗Small Group
Intimate Workshops
Hands-on, small group sessions built around fundamentals, intentional lighting, and creative clarity. You shoot, you learn, you leave with images you are actually proud of.
One on One
1:1 Private Mentoring
For photographers who want focused attention on their specific work. We look at your images, your lighting, your creative process, and build a clear path forward.
Remote
Virtual Coaching
Not in Nashville? No problem. Virtual sessions cover everything from lighting planning to portfolio review to business strategy, wherever you are.
HUGE THANKS TO:
ANTHONY ROMANO: Photography Assistant
NISSI LEE BEAUTY: Hair and Makeup
WESTLIGHT STUDIOS: Venue
I may be paid a small commission for items you buy. Read my affiliate disclosure here.
Frequently Asked Questions
1. How do you use fabric as a backdrop in studio portrait photography?
Hang your main backdrop panel from a long stand and let it pool on the floor. For depth and dimension, clamp additional fabric sections to C-stands with arms, positioning them at varying distances and angles so the panels create an environment rather than just a flat wall. A low fan positioned off to the side adds gentle movement that makes the fabric feel alive in the frame instead of static. Ivory or cream stretch fabric works particularly well because it has enough weight to drape with intention while still responding to airflow.
2. What is a constant light and why use it for creative portrait photography?
A constant light, also called a continuous light, stays on throughout the shoot rather than firing only at the moment of capture like a strobe. For creative portrait work, this means you can see exactly how the light is shaping your subject in real time, adjust the position to sculpt the rim or halo you want, and refine the setup before you take a single frame. The Godox SL150R is an RGB constant light that produces warm, cinematic color quality that is difficult to replicate with a strobe and a gel.
3. Can you combine a constant light with a strobe in the same setup?
Yes. In this shoot, the Godox SL150R provided the primary mood and warmth while a Profoto D2 bounced into the white ceiling for ambient fill. The key is establishing which light is your main source and keeping the secondary light subtle enough that it supports rather than competes. Bouncing a strobe into a white ceiling is one of the most natural-feeling fill methods available because it scatters light broadly without adding a visible direction.
4. What is ceiling bounce lighting and when should you use it?
Ceiling bounce means firing a strobe or flash upward toward a white ceiling so the light scatters down softly across the room. It produces a gentle, ambient fill that reduces deep shadows without introducing a second directional source. It works best in studios or rooms with white or near-white ceilings and is especially useful when you want to keep your main light as the clear visual hero while just opening the shadows enough to retain detail.
5. How do I make branding photos look creative instead of corporate?
Start with a clear understanding of who the client is and what their brand actually communicates. The wardrobe, the environment, the lighting, and the mood should all follow from that. Creative branding photography is not about using more equipment or more elaborate setups. It is about making intentional choices that reflect something true about the person you are photographing. When the setup serves the subject rather than competing with them, the result feels specific and powerful instead of generic.
6. Is a creative portrait session appropriate for business clients?
Absolutely. The most effective branding images show personality, authority, and character, not just professional appearance. For clients building personal brands, coaching practices, creative businesses, or communities based on their identity and perspective, editorial and creative portrait sessions often produce more memorable and versatile imagery than standard headshots. The goal is always to reflect who the client is and how they want to be seen by their audience.